A Step-By-Step Guide to Installing Bee Packages and Nucs
Installing a nuc or package of bees may seem intimidating to new beekeepers, but with a little research and practice, you’ll understand how to get your bees settled. Order your honey bees well in advance, typically in late winter, and they’ll arrive in time for you to install in the spring. While you wait for bee pick-up or delivery day, familiarize yourself with the most common bee installation methods: how to install package bees and nucs
The best time to install bees
Plan to install your bees based on the weather patterns in your area. Ideally, installing package bees on drawn combs containing honey and pollen happens in early April; installing bees on frames of foundation usually waits until May for increased forage opportunities. Our honey bee packages are available for pick up in early spring, just in time for warming weather trends and early-blooming flowers. Ultimately you’ll have to install your bees when you get them, but a responsible bee supplier shouldn’t sell you bees when it’s still too cold to put them in your hive.
The best time of day to install honey bees is late in the afternoon or early evening. Later in the day, the bees are often calmer and are ready to settle in for the night rather than wander or go out foraging. If it’s dark, wait until morning to install your package or nuc. Beyond the fact that your visibility is reduced in the dark, the hive may be quite cold since the bees won’t have been able to increase the temperature throughout the day. In addition, disturbed bees often crawl and sting when it’s dark instead of flying — which means they’re more likely to end up on you or even inside your beekeeping suit.
What to do the day you get your bees
You should install your bees as soon as you can. Assess the weather and decide when you’re most likely to have ideal conditions. A warm (between 60 to 65 degrees Fahrenheit), sunny day with little wind is perfect. While there’s a little flexibility when it comes to package bees, neither a package nor a nuc should wait long before installation. Keep your bees out of the elements until your afternoon or evening installation time — away from wind, rain, and heat. A cool, dark area such as a garage or a cool shed is fine for a short wait. Cool temperatures will keep the bees clustered together, and as long as the colony has some ventilation they can survive for a while before installation.
If you’ve had your bees shipped, inspect the package before installing them to ensure your bees are in good health. If you note a thick layer of dead bees or if the queen is dead, don’t install the bees. Instead, contact the company you ordered from right away to report the problem.
Can you install bees in cold weather or rain?
Installing bees in cold or rainy weather isn’t ideal, but may be necessary because springtime is unpredictable. You may be able to delay package bee installation for a day or two, but the sooner your bees can settle into their new home, the better. You may need to install your bees even if it’s chilly or drizzling, but in the event of frigid temperatures, snow, or a downpour you’ll want to wait until the weather clears up.
Because inclement weather means they may not be able to forage right away, feed your bees by supplementing with syrup. If the weather keeps you from installing right away, keep the bees in a cool, dark area that’s sheltered against the elements.
How to install a package of bees
A package of bees — a screened, wooden box that's filled with about three pounds of bees and a caged queen — offers a little flexibility in terms of your installation window, but you should always install bees as soon as possible after bringing them home. The best time of day to install a package of bees is in the late afternoon when it’s still light out but not too hot.
What tools do you need to install package bees?
Your beekeeping tools are designed to make installing and caring for your bees easier. Before you begin your installation, gather these tools:
A smoker is a beekeeping tool that you’ll use often in your beekeeping — but installation is not one of those times. Using smoke simulates a fire, and bees will react by gorging on honey, which makes them sleepy and calm. However, since bees in a package are already gorged on food and calm, adding smoke won’t help at all. Since bee installation causes little distress to the bees, the smoker is unnecessary. You may mist the outside of the package with 1:1 sugar syrup, but take care not to apply so much that the bees become drenched. This will help distract them: They’ll be busy eating and cleaning up the syrup and will pay less attention to you.
Installing your bees using the shake method
- Prepare your hive: If you have frames with drawn comb, place them in the center of the hive body. Your foundation frames will be placed on either side to sandwich the drawn frames in the middle. Remove some frames from the box, leaving just four or five frames in place. This allows space for you to “pour” your bees. Then, adjust an entrance reducer to the smallest size and put it in place at the front of the hive.
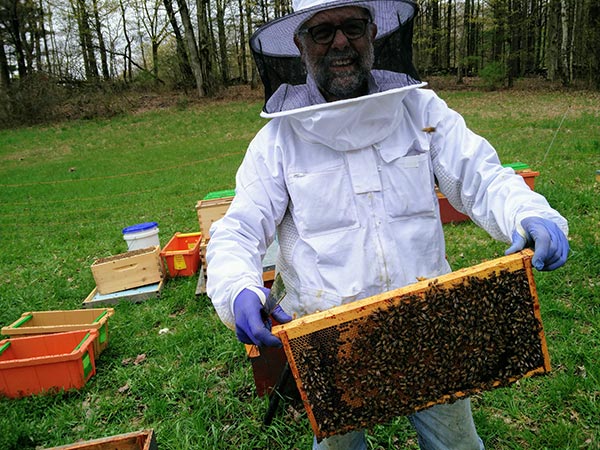
- Open the bee package: A three-pound bee package contains about 10,000 bees, a can of sugar syrup, and a queen cage. The queen cage is secured to the package frame with a metal or plastic tab. Using the hive tool, lift the tab that holds the queen cage in place and hold the tab while you pry the thin wood panel from the top of the package.
- Remove the queen and sugar syrup: After the wood panel has been removed, pull the can of sugar syrup out and set it aside — but keep hold of the queen’s cage and remove it once the can of syrup is out of the way. If you drop the queen cage into the package, don’t worry: You can retrieve it using the long kitchen-style tongs.
- Note: Do not release the queen. First, examine the queen and her attendants through the screen to ensure they’re alive. Then, use your fingers or hive tool to remove the cork or disc that covers the candy end of the cage and leave the other cork in place. The candy plug is a kind of “time-release” system to allow the queen out when the colony is ready for her, while other access holes were used to get the queen and attendants into the cage in the first place.
- Place the queen cage in the hive: You can wedge the queen cage between two frames, or use a rubber band or thumbtack to secure the queen cage to a frame. Either stretch the rubber band around the frame and slide the cage beneath it, or put the cage on the frame and secure it by pressing the tack through the tab that had been attached to the top of the package. When placing the queen, ensure the screen-side of the cage is not placed against the comb.
- Transfer the bees: After the queen’s cage is in place, gently bump the package, then pour the bees out of the package cage and into the hive. You may need to give the cage a little shake, but take it easy: A gentle jiggle is plenty, and anything more may aggravate your bees.
You don’t have to completely empty the package. If the weather is nice — not cold or wet — you can leave the package beside the entrance to the hive. Any remaining bees will find their way into their new home in a few minutes or hours.
- Close the hive: Add the remaining frames back into the hive, taking care not to harm the bees. Arrange the frames evenly and avoid leaving any large gaps between the frames to prevent lopsided combs. Add a feeder to supplement the bees’ foraging and to fuel their comb-building. You can place a hive-top feeder over the inner cover, add a deep hive body around the feeder, then put the outer cover on top of the hive. Secure the cover with hive straps or a rock to keep it from blowing away.
- Let the bees settle: After installation, allow the bees to adjust to their new location. After three to five days, check that the queen is out of her cage. She may need a little assistance: If she hasn’t been released, you can unplug the other hole and let her crawl out onto a frame. Four to five days later, eggs should be present.
Installing your package bees without shaking
If you are looking for a gentler option that doesn’t involve bumping or shaking the package, you can install your package using a no-shake method:
- Remove some frames from the hive body to make room to fit the entire package cage.
- Attach the queen’s cage to a frame as outlined above, then — while wearing beekeeping gloves — scoop and move a few handfuls of bees to the area around the queen to keep her warm.
- Set the package cage filled with the remaining bees inside the hive body. Allow the bees to walk out in their own time.
- Cover the hive and let the bees acclimate. Check the package after two to three days — most of the bees will have exited the cage at this point and the cage can be removed and the frames replaced. In good weather, you may leave the package beside the entrance so the remaining bees may exit and find their way to the queen.
A drawback to this method is that bees may begin building comb inside the package cage rather than on the frames, so it’s important to remove the cage and install the remaining frames as soon as you can.
How is the queen bee released from the cage?
When you receive a package of bees, the queen is secured in a screened box that has one or two openings, each sealed with a cork. When installing your bee package, the queen remains within this cage. Simply check the queen and her attendants for health, then remove the cork on the candy side of the cage (leaving the second cork in place).
After the queen’s cage is secured to the frame and the package has been installed, the bees will eat the candy plug, slowly opening the cage to release the queen. This process usually takes between two to six days — during this time, the colony will accept the queen. If she’s still inside the cage on your first check and you don’t note any aggressive behaviors from bees surrounding the cage (like biting the mesh of the cage), remove the other cork and allow her to walk out into the hive.
How to install a bee nuc
A nucleus hive, or nuc, is a small colony of honey bees that has been separated from a larger colony — it includes a laying queen, brood, honey, and pollen. Nucs are either overwintered or produced by dividing large colonies in spring. Because the nuc is an established colony, the queen is loose inside the nuc rather than in a cage.
As with package bees, the best time of day to transfer bees from nuc to hive is in the late afternoon or early evening. Gather your hive tool, safety gear, entrance reducer, and nuc, then follow this process for transferring bees from nuc to hive:
- Remove six frames from the center of the hive body. Install an entrance reducer to prevent robbing while the colony grows.
- Remove the frames from the nuc, one by one, and gently insert them into the center of the hive body. Adding the drawn frames to the center allows bees to build comb from the center frames, outward. You may need to use a hive tool to loosen the frames from the nuc, especially if the edges of the frames are sealed with propolis. As you install the frames, ensure they’re placed in the same order as they were in the nuc.
- After all of the frames have been transferred from the nuc, add back any frames you removed until you’ve filled the hive body — the hive should include eight frames total for an 8 frame hive, ten total for a 10 frame hive. Replace the top cover and allow your bees some time to adjust to their new home.
After installing your nuc, you may supplement by feeding sugar syrup. Some beekeepers supplement until the frames are fully drawn, some until the bees lose interest in the feed, and some supplement into the summer.
Installing your package or nuc is an exciting day in your beekeeping journey. Consider these steps and tips for how to install your package bees or nucleus hive, and keep exploring our Beginner’s Guide to Beekeeping for more information about buying honey bees, colony care, and new beekeeper FAQs.