It’s easy to make your own mite sampling jar for sugar roll tests — and you can get the supplies easily from the grocery store and hardware store. They’re so simple to create that you may choose to do up a couple to have on hand, especially if you have multiple hives to tend. Learn why sugar rolls are one of the most popular mite testing methods among beekeepers, and follow these quick and easy instructions to make a DIY sugar roll jar.
Why use a sugar roll jar?
Regular mite testing is necessary for the health of your bees, and the monitoring method you use depends partly on preference. An alcohol wash will kill around 300 bees, and while it’s not that many compared to how many bees remain, some prefer a test that doesn’t kill the bees. A sugar roll test may be a good option, in this case. This process is a little more time-consuming than an alcohol wash test, and sugar roll test results may be slightly less accurate, but it’s a suitable testing method — especially when combined with other mite monitoring and treatment techniques.
DIY sugar roll jar instructions
To make your own sugar roll jar, first gather the necessary tools and supplies.
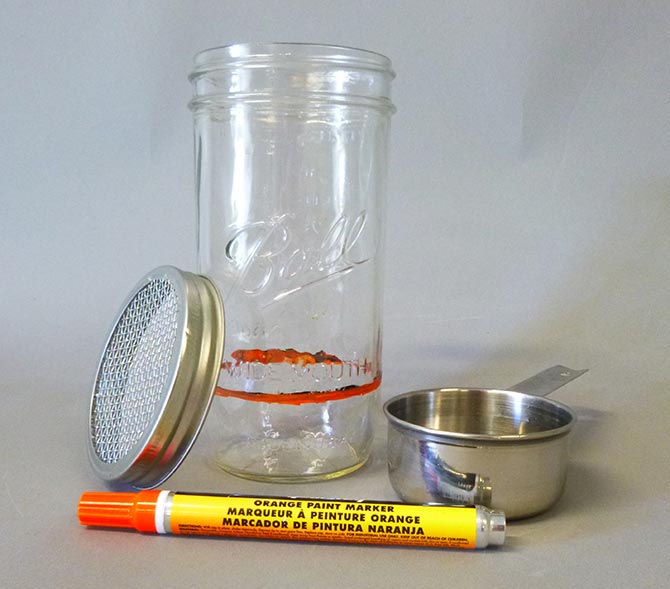
We suggest a:
- Canning jar and ring
- 4-inch by 4-inch piece of #8 screening
- Sharpie
- Aviation snips to cut the wire screen
- Needle-nose pliers
- Latex paint marker in any bright color (not black)
- Half-cup measuring cup
- Hair dryer (if planning to do the test immediately after fabrication)
Quick tip: The best collection jar is a 1 ½ pint, straight-sided, wide-mouthed canning jar; next best is a wide-mouthed quart-sized canning jar. You will need the ring part of the two-piece lid, but not the lid itself.
Make your sugar roll jar
Crafting your sugar roll jar only takes a few quick steps. Follow these easy assembly instructions and you’ll be ready to test in minutes.
- Place the lid on the screen and use a Sharpie to draw the outside outline of the ring on the screen.
- Cut the circle out and place the screen piece underneath and inside the ring, jamming it in tightly.
- Use needle-nose pliers to fold over and tuck the ends of the wires into the threads of the ring to prevent injuries to bees during the shake-out procedure.
- Pour exactly ½ cup of water into your jar and place it on a level surface, then use the paint marker to mark the water level around the jar circumference.
- Dump out the water and let the jar air dry completely. Or, if you’re in a hurry to start the test, use a hair dryer to dry all traces of moisture.
Once the jar is totally dry, you’re ready to complete a sugar roll test. If you have more than a couple of hives, it’s very useful to make a few extra jars so that if one becomes too clogged with sugar as you test, you have fresh options on hand — without taking time to wash and dry the used jar.
Mite monitoring and subsequent treatments are imperative to your bees’ health. For more mite management tips and information, explore our Beekeeping Guide.