This general overview of ideas on how to build your own hive components should get the gears turning for you, but if you would like specific instructions on how to build your own hive, check out Build Your Own Beekeeping Equipment by Tony Pisano. This guide includes step-by-step illustrated instructions to help you build hive bodies, supers, frames, feeders, and more using hand tools.
Some of us are handy. Some of us aren't. Know thyself, as Socrates taught. But how do you know if you can "Do It Yourself" unless you try? You may want to try building some of your own beekeeping equipment and save money. DIY is not recommended for things like frames, or a cobbled-together DIY smoker (picture that). Basic items like a cover, shim, or super may work out fine. When you begin the beekeeping DIY adventure, it’s best to start small and gain an understanding of the important things.
The importance of bee space in your homemade hive bodies
Bee space is a very important detail, and in fact, it was the discovery made by L.L. Langstroth that allowed moveable frames to work. Bee space is the distance bees need to walk inside a hive, like between the end of a frame and the inner box wall, between frames, or over the top of a frame. If they don’t have a bee space, they put propolis in the gap, and things get stuck. If they have more than bee space, the bees build comb, which also sometimes can make hive parts hard to manipulate if the comb isn’t in a frame! When you get out the saw and start cutting boards for a brood box or super, make sure the inside dimensions are correct and bee space will be fine. Then your frames will be more likely to be easily moveable, and the covers won’t be glued down so terribly. It’s best at first to carefully copy a purchased box.
What to keep in mind when making your own outer cover for your hives
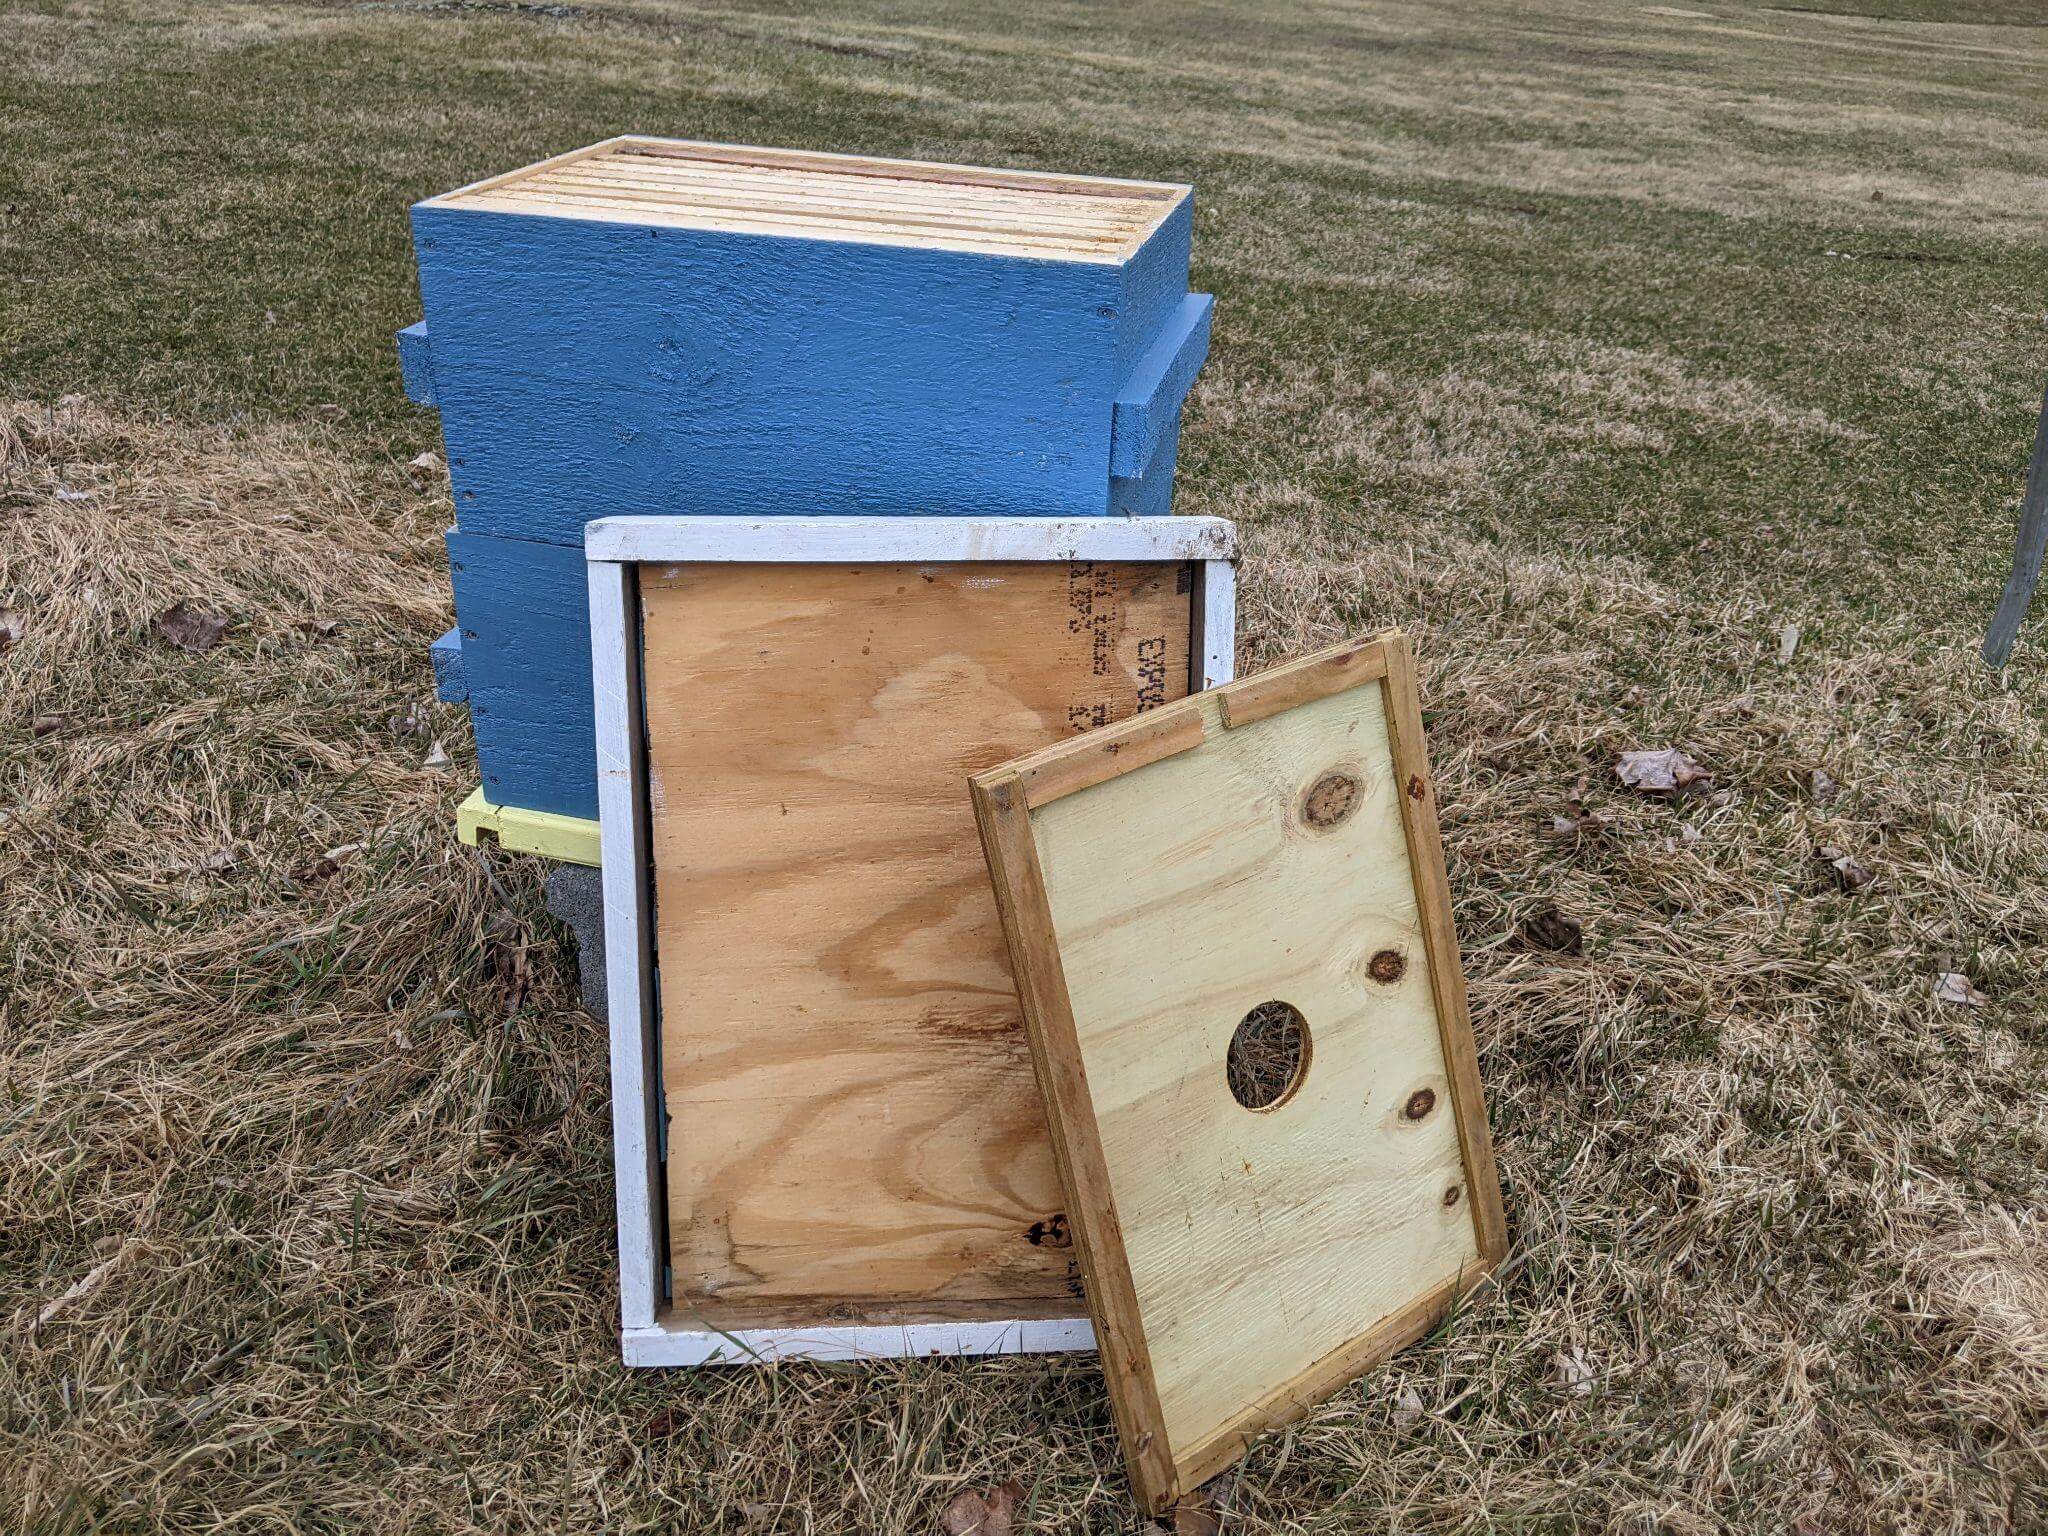
To adhere to the concept is more important in some cases than to copy a purchased item exactly. Here are a few examples. The main job of the outer cover is to keep rain and snow out. The Telescoping Outer Cover is wonderful, with metal covering wood, and short overhangs that extend downward, allowing for a bit of ventilation at the inner cover notch. However, in a pinch, I’ve used a piece of old plywood or a piece of corrugated metal left from a roofing project. The main purpose is achieved: the weather is kept out. These covers had no overhangs, but they were fine for a while. Some people go partway and just put a small board that hangs down a bit at the front and rear. This is more like a Migratory Cover.
How to make your own hive inner cover
Another example of following the concept rather than reverse engineering an actual item:
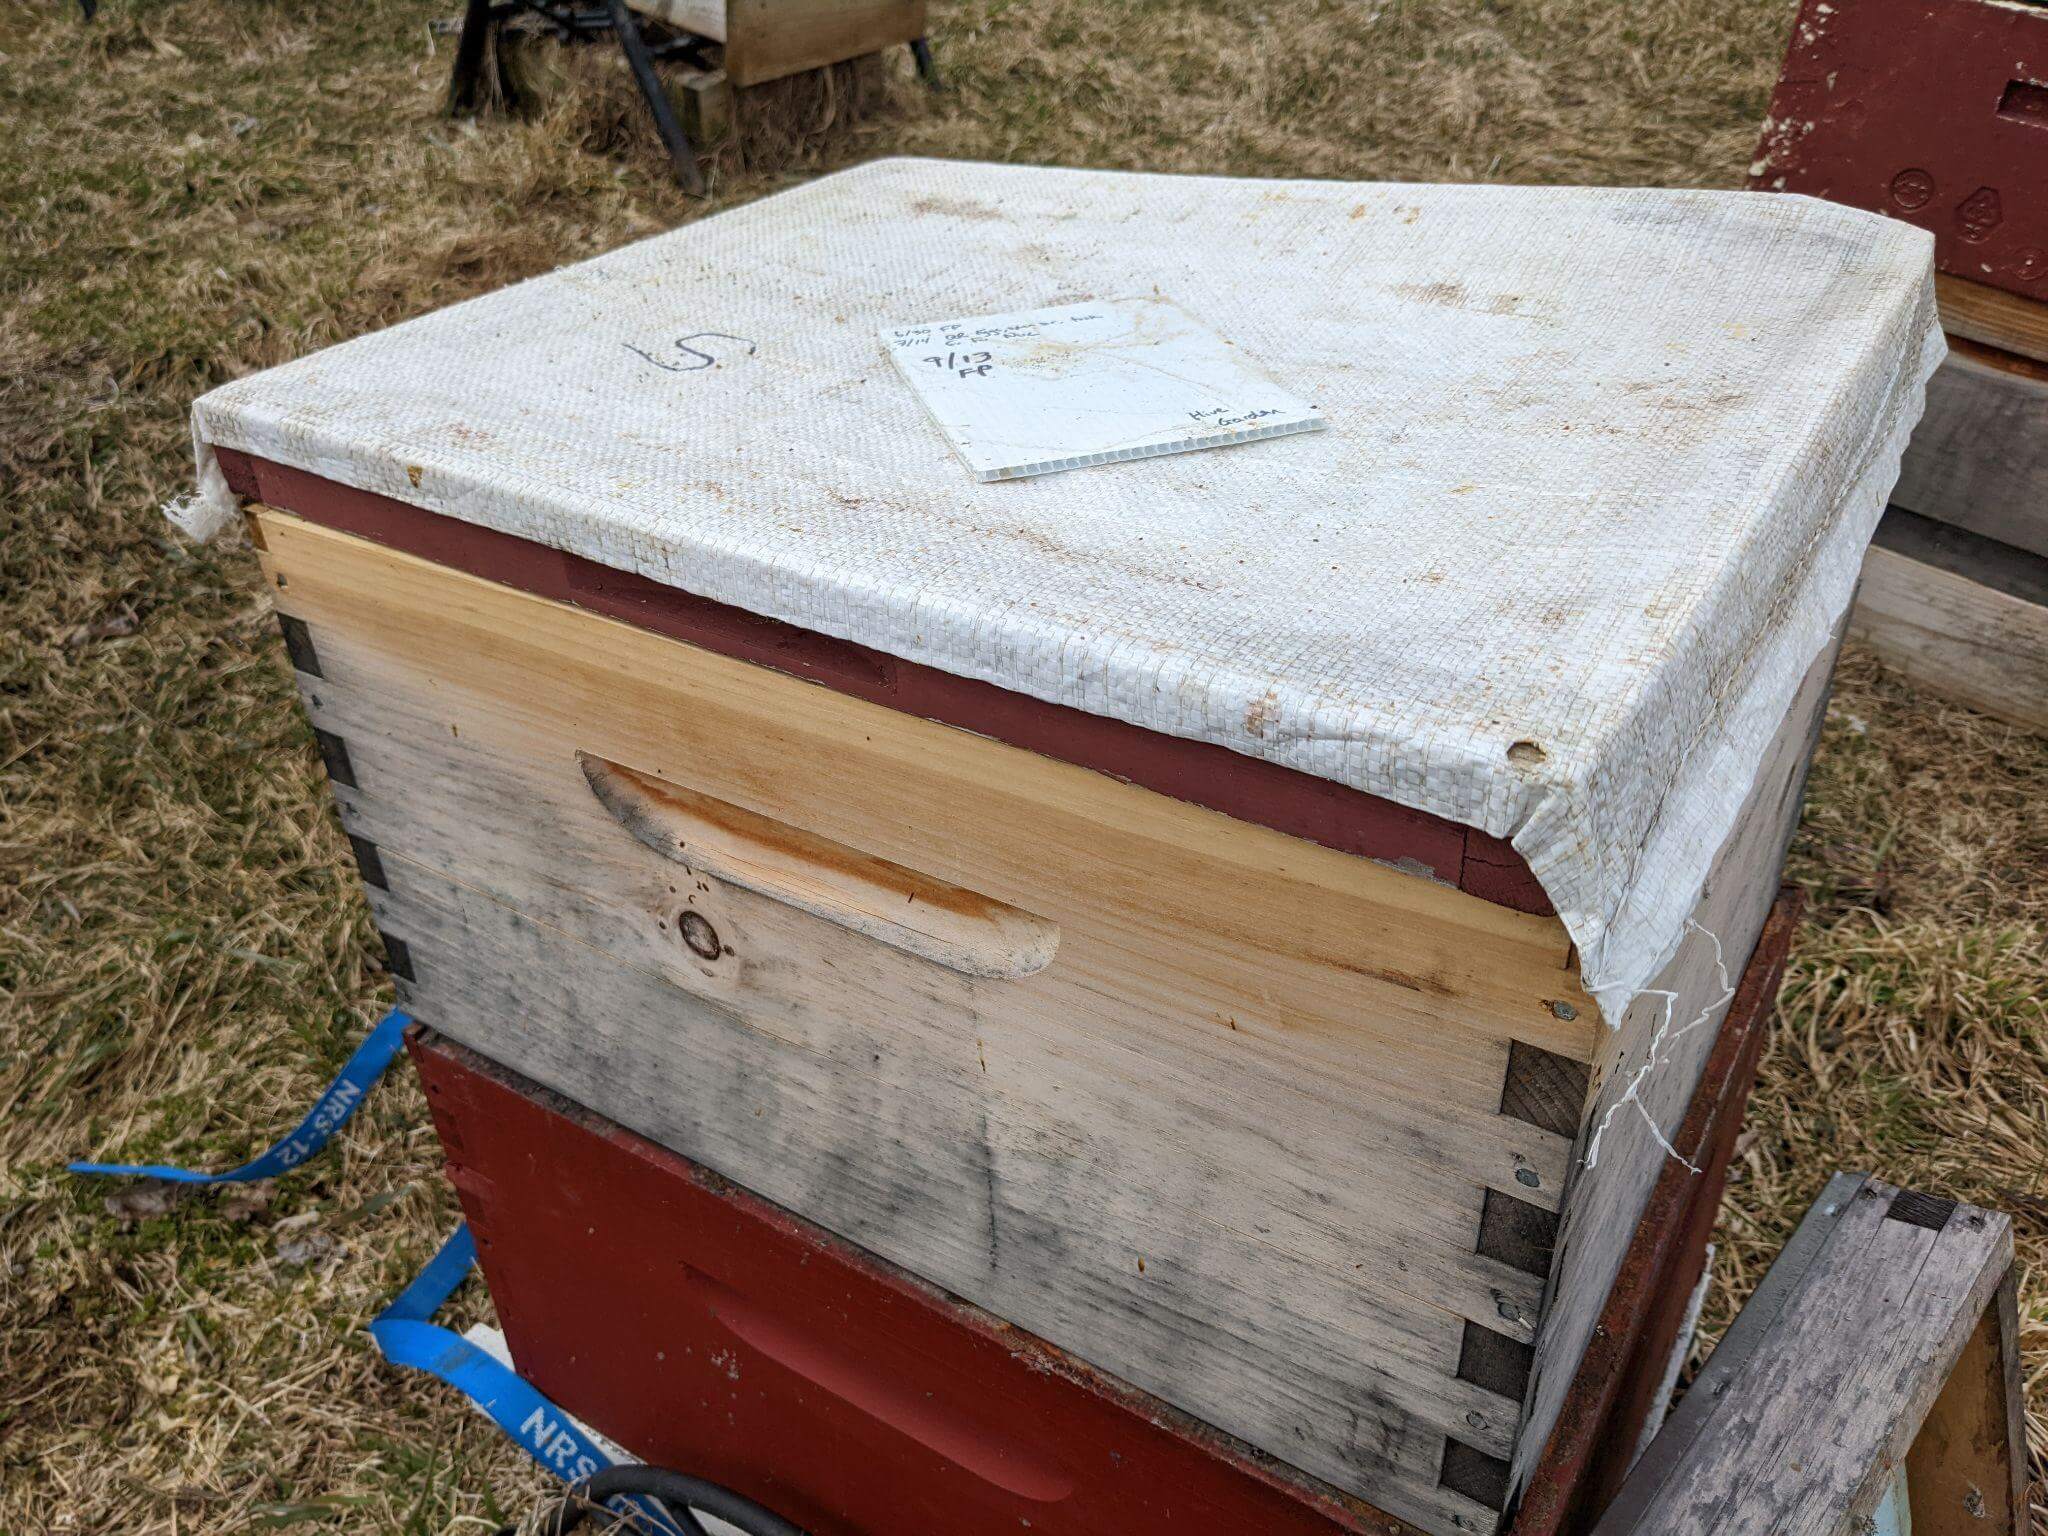
For an inner cover, the main concept is to keep the frames from being stuck to the outer cover. If you examine a standard inner cover, it’s a pretty complicated set of edge pieces added to a thin flat board with a central hole for a feeder. A simpler inner cover can be made by using a plastic feed bag from horse grain or pet food. Some folks use what I call foil bubble wrap - a type of insulation - as their inner cover. A feed bag or foil insulation sticks lightly to the top bars because the bees put propolis under it, but is pretty easy to peel back and off, and keeps your outer cover from sticking down to the top bars. For the feeder hole, it’s fine to cut a V-shaped flap and create bee access for a bucket feeder or Mason jar. With the feed bag or foil inner cover, there is no upper ventilation. Feelings about upper ventilation vary.
An example of a homemade hive setup
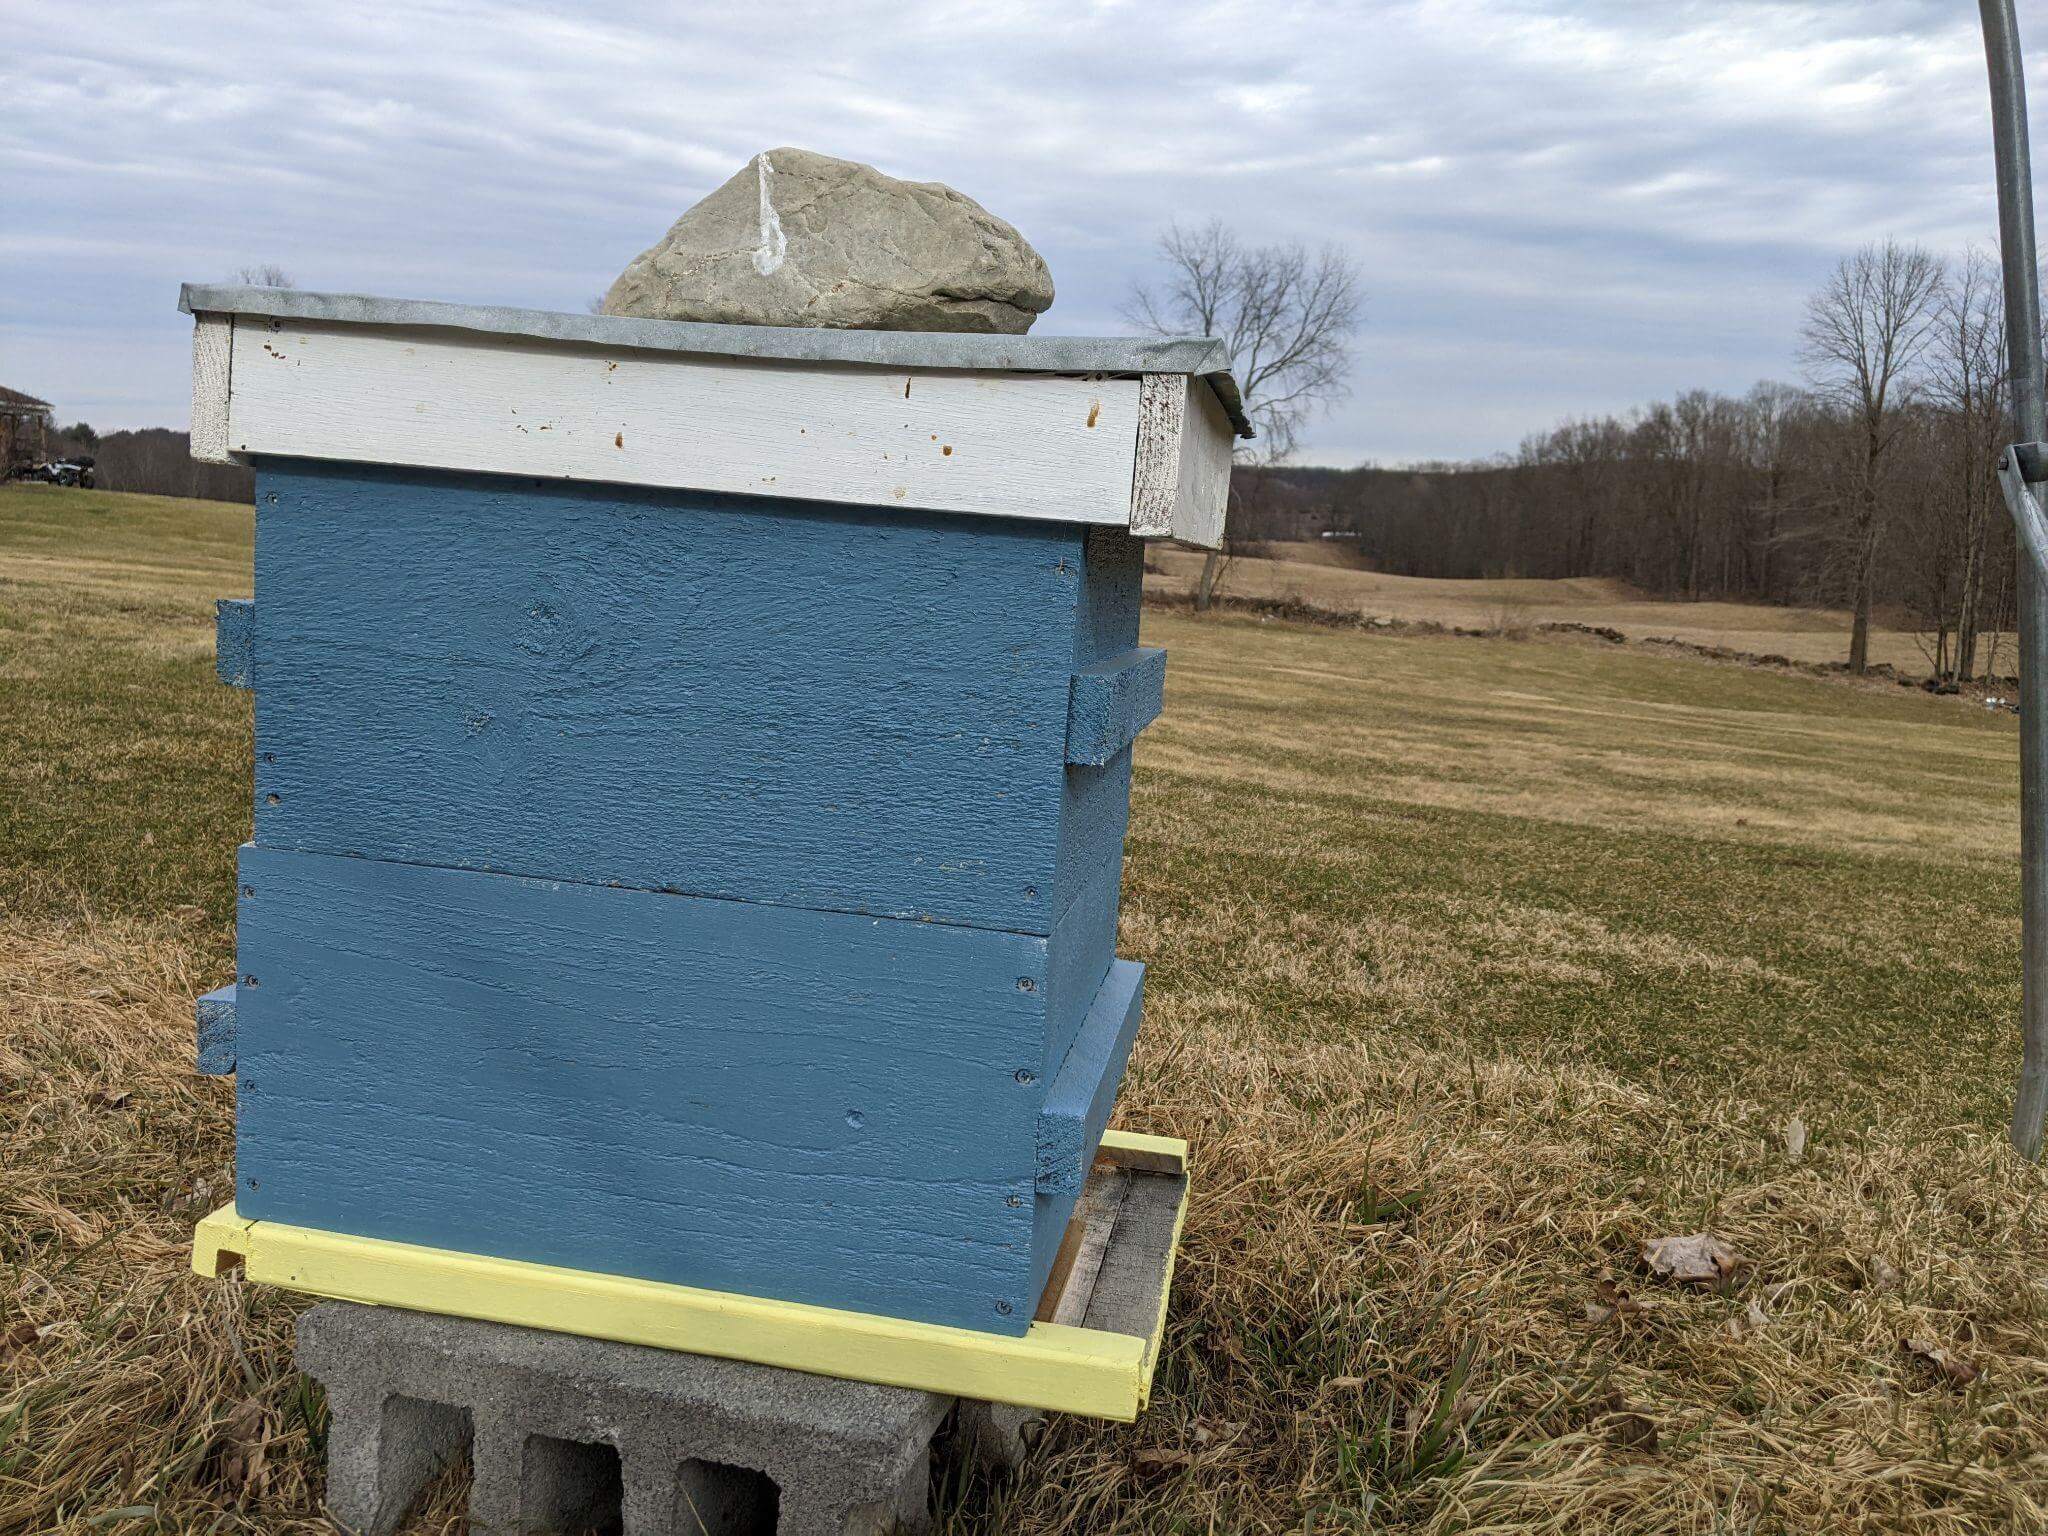
Greg, one of Betterbee’s beekeepers, made the hive seen here from scratch. He built every bit except the frames. Rough-cut lumber is interesting for DIY hives because bees add a lot of propolis to the inner walls. Some researchers believe a propolis “envelope” is desirable, and more like what wild bees have inside tree trunks. Propolis is antibacterial and seals the wood. If bee space is followed carefully, the propolis on the flat inner walls will not interfere with moveable hive parts.
The handles are quite thick which makes heavy supers feel lighter. You can get a really good grip and lift more easily. I also like the add-on handles better than the usual carved-out kind because the carved-out kind takes away nearly all the wood in 4 spots, so heat may be lost there.
Next is a piece of flashing that has been cut to size, then a segment was snipped twice and bent up to form a bee-height, 3-inch wide hive entry point. Add a few push pins and you have a metal mouse guard/entrance reducer. The concept is to use something metallic that mice can't chew. The simplest mouse guard is hardware cloth, which is actually metal mesh, not cloth. In a pinch, during summer robbing incidents, I have used small chunks of scrap lumber and even Legos to reduce hive entrances instead of waiting for wood entrance reducers to arrive.
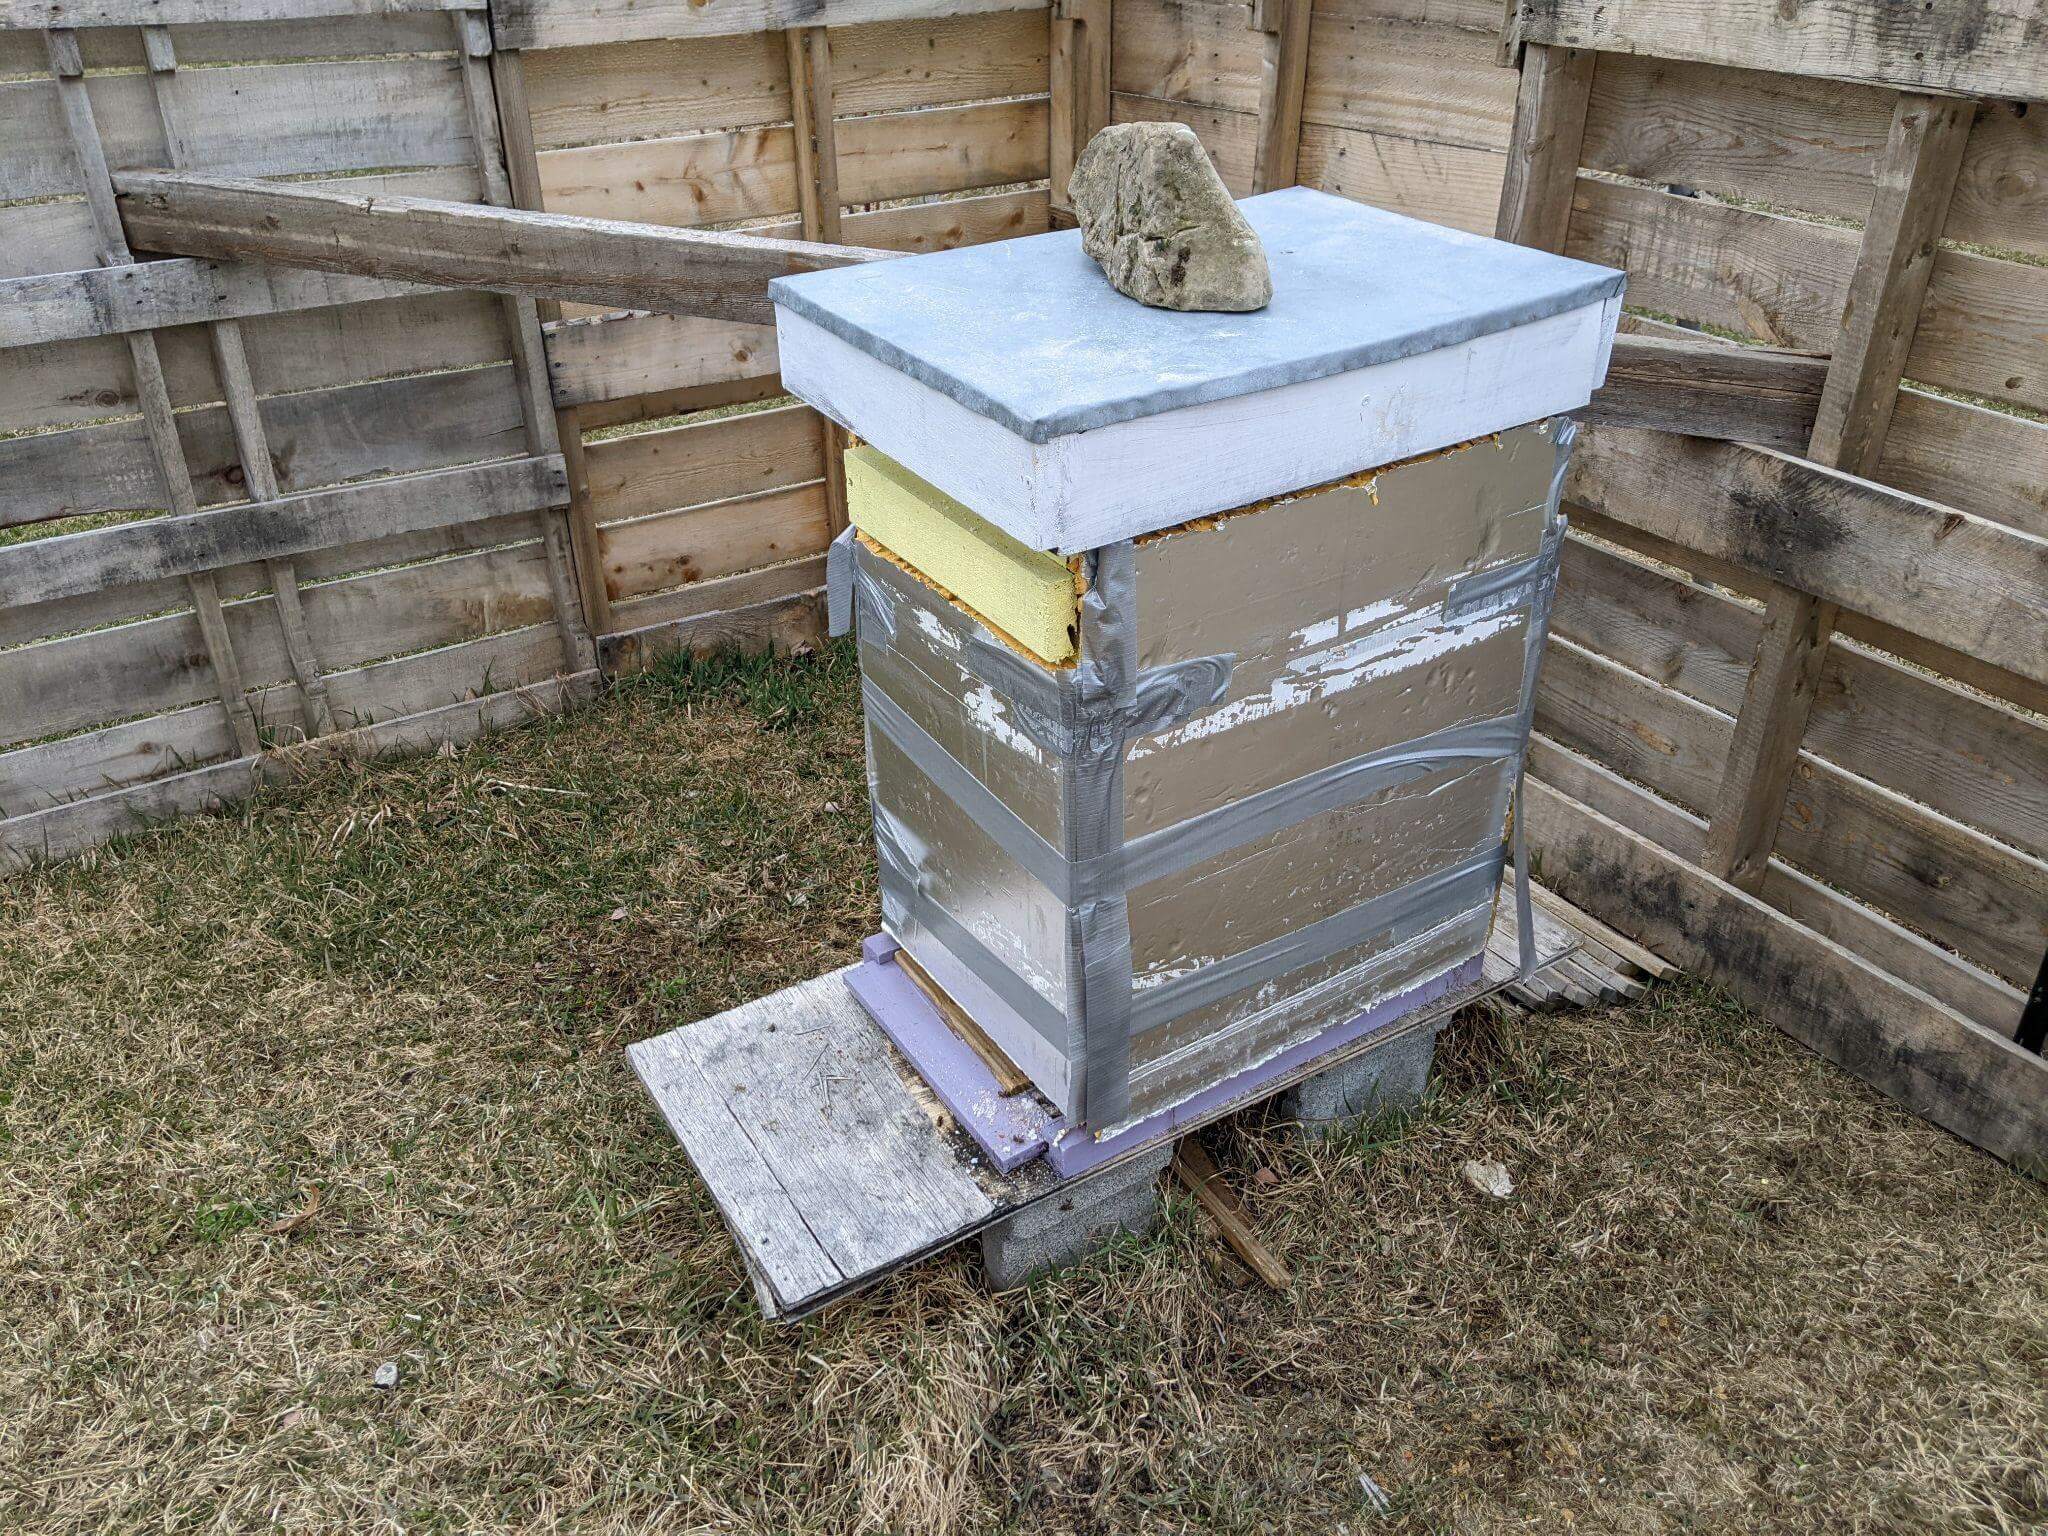
You might also note that the hive is on 2 cement blocks, flat sides horizontal so they don’t sink into the ground. This is a nice, cheap hive stand. A small pallet can also be used for a hive stand, but it will rot away after a few years. Beware of the suddenly tipping hive! I’m not a fan of full-size pallets as hive stands unless they have 4 hives on them and completely cover the pallet. If you’re standing on a pallet, a stumble or twisted foot is in your future. Let’s leave the risks at simply the usual list: stings, heavy lifting, sharp hive tool, and smoke inhalation.
The hive to the right shows a homemade wrap for winter insulation. It’s made of one-inch thick foil-backed rigid insulation and can be kept for future years. A strap around it instead of duct tape could make it easier to remove. This beekeeper has made a temporary winter windbreak from free pallets because, at his site, the cold wind would put constant stress on the colony for 6 months out of the year.
After trying to make a few items, use them and make sure they work well before forging ahead and building stacks of them. You may find that your measurements were off and parts stick badly, or you really are not fond of making the little step that frame ends rest on. Some items may be real money-savers but for other items, just know that we’re here for you if you want to buy a tried-and-true product!
We hope this sparked your interest in trying your hand at building your own bee equipment! For more specifics (with diagrams and illustrated step-by-step instructions), check out Build Your Own Beekeeping Equipment by Tony Pisano. If you're looking for a middle ground, we also offer unassembled and fully built beekeeping equipment—perfect for the pieces you can’t (or don’t want to) build yourself.