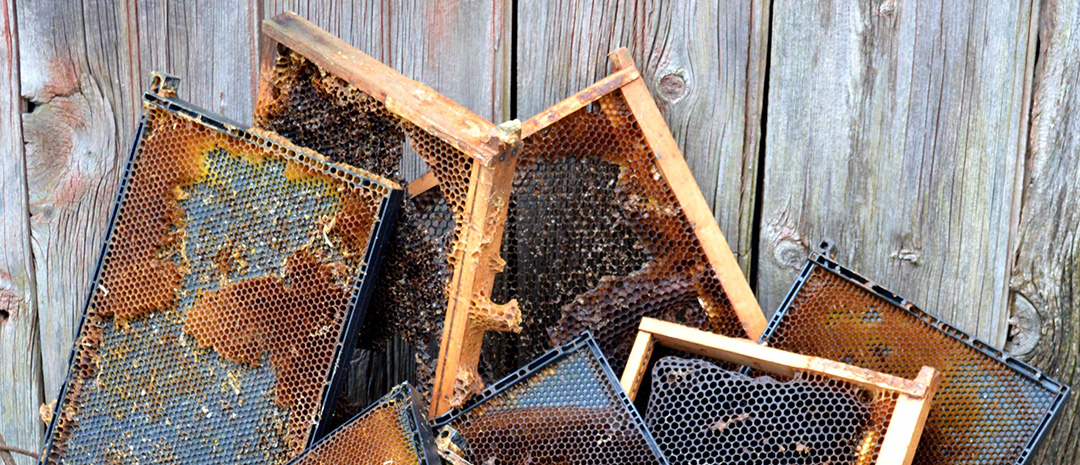
It’s not uncommon to gather up bee frames with messy comb. Perhaps they were started late and were never finished; maybe they were damaged in storage; or your bees got creative and now you have comb areas raised off the foundation by a quarter of an inch. If you have old frames with untidy, misshapen combs that neither you nor your bees like, clean and rehab them for future use!
When should I throw away my bee frames?
Bee frames can often be used for years before needing to be replaced, especially when you put effort into rehabbing aging or improperly drawn frames. However, it is important that if there is any question that these frames have ever been exposed to American Foulbrood, don’t even consider rehabbing them — burn them without hesitation.
Can I reuse old bee frames?
You may have kept old frames around for emergency use or for swarm traps — having a few extra frames for those purposes is smart. Every good beekeeper appreciates just how much work (and honey!) it takes for the bees to draw combs. That makes it easy to rationalize hanging on to less-than-perfect ones, just in case.
But remember, sooner or later these spare frames will fall prey to mice or wax moths. Before you get slammed with all your spring bee work, take the time to sort through your storage area and make a pile of your stashed problem frames. With a little effort, you can clean up your extra frames and re-use them. A strong colony, if given cleaned-up foundation, will turn that stack of problems into lovely, straight combs in just a few weeks during summer.
Instructions for cleaning frames
Frames with old black comb, comb with areas of dried-out pollen, warped or lumpy comb, large damaged areas, undrawn patches, wax moth damage, or weird knobs of wax can all be cleaned up and returned to service!
1) Remove excess wax. Start by scraping off all the wax that you can. If you have a solar wax melter, you can recapture a surprising amount of clean wax from even the most shabby-looking comb. You can also render wax in an old crock pot. Even if you don’t have plans for the wax right now, you might in the future. If the frame tops are soiled by bee poop, scrape it off into a trash bag and dispose of the waste.
2) Give them a scrub. With the foundation free of wax, you can clean things up even further with a good scrub in hot water. Use the hottest water you can and scrub both the foundation and frames well.
Quick Tip: Don’t use your sink for scrubbing frames! The hot water will melt off additional wax and you don’t want that wax running down your drain and cooling into a hardened clog in your pipes.
3) Thoroughly dry your frames. Rinse and let your frames air dry. While drying, keep them out of the sun to prevent the plastic foundation from warping.
Can you clean wired frames, too?
Yes, wired frames can be rehabbed, too. Don’t cut through the wires, just cut off the comb. As long as the wires are still intact, you don’t need to replace them before adding a fresh sheet of wax foundation. If scrubbing wired frames, take care when submerging or soaking them: Prolonged soaking can weaken the wood and loosen the wire tension.
How to re-wax bee frames
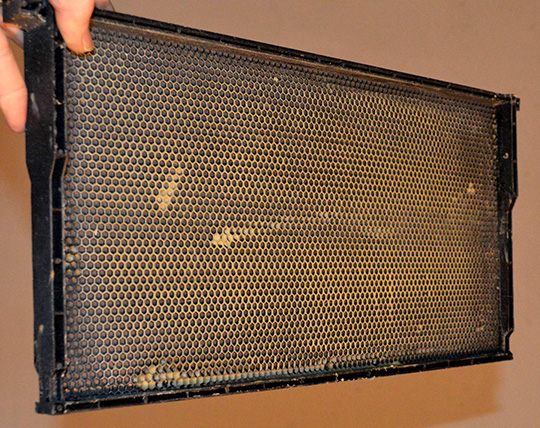
Freshly rewaxed frame
Once the plastic foundation is dry, you should recoat it with a layer of beeswax to make it highly attractive to the bees. A pound of wax will generously recoat about 10 to 11 deep frames. You can purchase wax or recycle your own after it has been rendered and filtered.
Simply melt your wax in a crock pot, then use a disposable foam paint brush to apply a fresh coat of melted wax from the crock pot. Start by going across the foundation the long direction, then the short direction, and finally on both diagonals.
Use a fast, light-handed stroke so the wax builds up on the embossed ridges of the foundation and doesn’t fill up the cells. Properly done, you will hardly see the new wax as it is being applied — but it will cool into a clear, white tracery of the cell pattern.
You may prefer to use a paint roller or dip your frames to re-wax them, but we find that the paintbrush method is the most reliable.
Storing your prepared frames
Once the frames have been re-waxed, store them in boxes ready to be delivered to a hive. If you’re storing them for an extended period, ensure your frames are placed in a cool, dry location that is protected from excess heat, humidity, rodents, and pests. Consider lining frames up inside supers, which aids in stacking, can prevent frame damage and warping, and allows better air circulation.
For beekeepers, having fresh boxes of prepared frames stacked and ready to go feels like money in the bank — replacing those frames would have cost you three or four bucks each, so this is a great way to stretch your beekeeping budget. For more beekeeping tips and tricks, explore our Beekeeper Guide.